How to Clean Treadmill Belt
To clean your treadmill belt, first unplug the machine and let the belt cool. This ensures safety and prevents any damage. Use a soft cloth with mild detergent to wipe away dirt and sweat.
Then, dry the belt thoroughly to avoid moisture damage. Clean your treadmill belt every 10 to 15 hours of use to maintain performance and prevent slippage. Regular cleaning also reduces wear and friction.
If you want to optimize maintenance and troubleshoot common belt issues, there are key techniques and tips worth exploring. Following these steps will help keep your treadmill in excellent condition.
Key Takeaways
- Unplug the treadmill and allow the belt to cool before starting the cleaning process for safety and to prevent damage.
- Use a soft cloth with mild detergent to gently wipe the treadmill belt, removing dirt, sweat, and debris.
- Dry the belt thoroughly and let it air dry for at least 30 minutes before using the treadmill again.
- Clean the belt regularly after every 10 to 15 hours of use to maintain optimal performance and prevent buildup.
- Maintain a clean workout area and use a treadmill mat to minimize dirt and dust accumulation on the belt.
Benefits of Regularly Cleaning Your Treadmill Belt
Although you might overlook it, regularly cleaning your treadmill belt is essential for maintaining peak performance and extending the machine’s lifespan.
Dirt, dust, and sweat accumulation can degrade treadmill performance by increasing friction and causing uneven wear.
By adhering to a strict maintenance schedule that includes cleaning, you prevent belt slippage and motor strain, ensuring smooth operation.
This proactive approach reduces the risk of costly repairs and downtime.
Cleaning also helps maintain proper belt alignment and tension, critical factors for safety and efficiency.
Consistent maintenance safeguards your investment, enhancing treadmill functionality and user experience.
Integrate belt cleaning into your routine maintenance schedule to support ideal treadmill performance and prolong the equipment’s service life effectively.
How to Prepare Your Treadmill for Cleaning
Maintaining your treadmill belt’s cleanliness starts with proper preparation of the machine itself. Prioritize treadmill safety by unplugging the device to prevent accidental startups. Allow the belt to cool if recently used, as cleaning a hot surface can cause damage.
Review your treadmill’s manual to determine the recommended cleaning frequency and any specific preparation steps.
| Preparation Step | Purpose |
|---|---|
| Unplug the treadmill | Guarantee treadmill safety |
| Cool the treadmill belt | Prevent damage during cleaning |
| Consult the user manual | Follow manufacturer’s guidelines |
Step-by-Step Guide to Cleaning Your Treadmill Belt
First, gather all necessary cleaning supplies, including a soft cloth and mild detergent.
Next, carefully wipe down the treadmill belt, ensuring you remove dirt and sweat without soaking it.
Finally, dry the belt thoroughly to prevent any moisture damage before use.
Gather Cleaning Supplies
To effectively clean your treadmill belt, gather four essential supplies: a soft cloth, a mild detergent or specialized treadmill cleaner, a screwdriver for access panels, and a vacuum with a brush attachment.
Use microfiber cloths as your primary cleaning tool; they efficiently trap dust and debris without scratching the belt’s surface.
Select cleaning products formulated for treadmill maintenance or mild detergents diluted in water to prevent damage. The screwdriver will help you remove the motor cover or side panels, giving you access to areas where dust accumulates.
The vacuum’s brush attachment is vital for removing dirt and lint from hard-to-reach spaces around the belt and motor housing.
Having these carefully chosen supplies ready guarantees a thorough and safe cleaning process.
Clean And Dry Belt
Start by unplugging your treadmill to guarantee safety before cleaning.
Next, focus on thoroughly cleaning and drying the belt to confirm peak treadmill maintenance. Follow these precise steps:
- Use a damp cloth with mild soap to wipe the belt surface, removing dirt and sweat buildup.
- Immediately wipe the belt with a dry microfiber cloth to prevent moisture from seeping into the motor or belt layers.
- Allow the belt to air dry completely for at least 30 minutes before plugging the treadmill back in and resuming use.
Maintaining a regular cleaning frequency, ideally after every 10 to 15 hours of use, prevents premature wear and preserves belt performance.
Consistent care like this extends your treadmill’s lifespan and confirms a smooth workout experience.
How to Clean Underneath Your Treadmill Belt Without Removing It
Although you won’t remove the treadmill belt, you can still access and clean the area underneath by carefully lifting the belt edges.
Begin by unplugging the treadmill for safety. Use a flat, soft tool to gently raise the belt edges without causing damage.
Always unplug your treadmill before gently lifting the belt edges with a soft tool for safe cleaning.
Once lifted, employ a microfiber cloth dampened with a mild cleaning solution to wipe away dust, dirt, and debris under the belt. Avoid using excessive moisture to prevent internal damage.
Focus on consistent treadmill maintenance by performing this cleaning technique regularly to prolong belt life and guarantee smooth operation.
After cleaning, lower the belt edges carefully and inspect belt alignment.
This method enhances treadmill performance without the complexity of belt removal, making it an efficient cleaning technique for routine treadmill maintenance.
When and How to Lubricate Your Treadmill Belt
When your treadmill belt begins to produce squeaking sounds or feels less smooth during use, it’s time to lubricate it. Proper lubrication reduces friction, extends belt life, and maintains performance.
First, identify the correct treadmill lubricant types. Silicone-based lubricants are commonly recommended for most belts.
Next, determine the lubrication frequency: typically every 3 to 6 months or after 150 miles of use, but consult your treadmill’s manual for specifics.
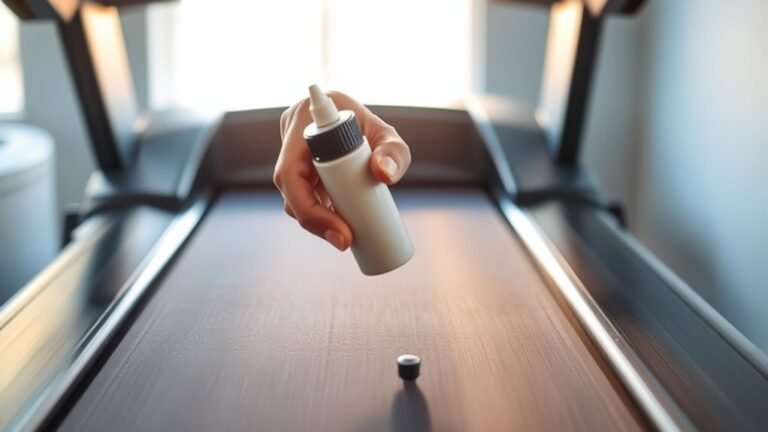
Follow these steps to lubricate:
- Turn off and unplug the treadmill.
- Loosen the belt slightly to expose the deck edges.
- Apply a thin, even layer of lubricant under each side of the belt, then tighten and test.
Lubricating precisely maintains your treadmill’s smooth operation and prevents costly repairs.
Tips to Prevent Dirt and Sweat Buildup on Your Treadmill Belt
Since dirt and sweat can quickly degrade your treadmill belt’s performance, you should implement preventive measures to keep it clean. Focus on sweat management by wiping the belt and surrounding areas after each use.
Additionally, position your treadmill in a low-dust environment to reduce dirt accumulation. Use a mat underneath to catch debris.
| Preventive Measures | Benefits |
|---|---|
| Wipe belt after workouts | Removes sweat, prevents buildup |
| Use treadmill mat | Collects dirt and dust |
| Keep workout area clean | Minimizes airborne particles |
How to Tell When Your Treadmill Belt Needs Replacement
Maintaining a clean treadmill belt helps extend its lifespan, but wear and tear will eventually require replacement. You need to watch for specific replacement signs to avoid damage or injury.
- Visible Belt Wear: Inspect for fraying edges, cracks, or thinning areas. These indicate the belt’s structural integrity is compromised.
- Unusual Texture or Slippage: If the belt feels sticky or slips underfoot despite proper tension, it’s a clear sign of advanced wear.
- Persistent Noise or Vibration: Excessive noise or vibration during use often signals belt deterioration, requiring replacement.
Regularly monitor these signs to maintain safe, efficient treadmill operation. Ignoring belt wear can lead to motor strain or sudden belt failure, so addressing replacement signs promptly guarantees your equipment remains reliable and safe.
Troubleshooting Treadmill Belt Slippage and Noise
If your treadmill belt slips or makes noise, you need to first identify the cause, which often stems from improper tension or debris buildup.
Check for uneven belt alignment and listen carefully to pinpoint whether the noise comes from the belt or motor area.
Then, adjust the belt tension according to the manufacturer’s specifications to restore smooth operation.
Causes Of Belt Slippage
When your treadmill belt slips or produces unusual noise, it often signals underlying mechanical issues that need immediate attention. Addressing these promptly prevents further damage and guarantees safe operation.
The primary causes of belt slippage include:
- Belt wear: Over time, the belt surface deteriorates, reducing grip and causing slippage.
- Friction issues: Insufficient lubrication between the belt and deck increases friction, making the belt harder to move smoothly.
- Improper belt tension: A belt that’s too loose won’t maintain proper traction, leading to slipping during use.
Regularly inspect your treadmill for these conditions.
Adjusting tension, cleaning, and lubricating the belt as recommended can restore ideal performance and prevent costly repairs.
Identifying Belt Noise Sources
Belt slippage often comes with various noises that can help pinpoint specific issues. When you hear belt squeaking, it usually indicates insufficient lubrication or a misaligned belt causing friction.
Unusual sounds like grinding or thumping may signal debris trapped under the belt or worn-out components such as rollers or bearings.
To identify the noise source, first power off the treadmill and visually inspect the belt’s surface and edges for damage or foreign objects.
Next, manually rotate the belt to detect resistance or irregular movement. Listen closely while the treadmill runs at low speed to isolate the noise location.
Documenting these observations will guide you in addressing the root cause effectively without guesswork, ensuring your treadmill operates smoothly and quietly.
Adjusting Belt Tension Properly
Although treadmill belt slippage can stem from multiple factors, adjusting the belt tension properly remains a critical step in resolving noise and performance issues.
To perform tension adjustment correctly, follow these steps:
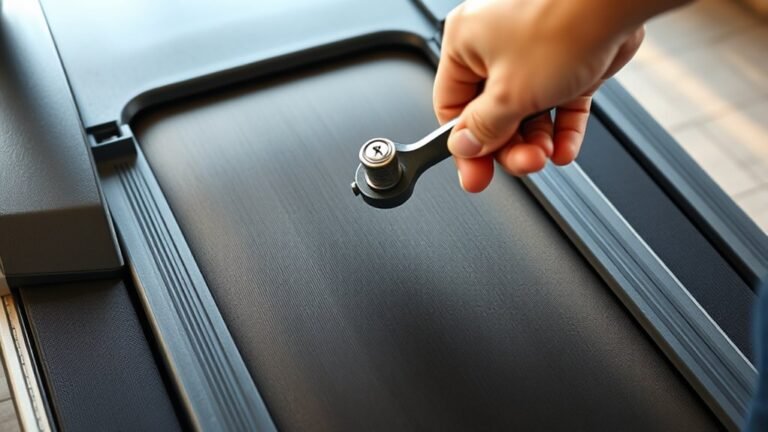
- Locate the tension bolts at the treadmill’s rear roller and use the appropriate wrench.
- Turn the bolts clockwise in small increments (usually 1/4 turn) to increase belt tension; avoid overtightening to prevent belt damage.
- Test the belt by lifting the edge. It should lift about 2-3 inches. If it slips or produces noise during use, repeat the adjustment.
Proper belt tension guarantees smooth operation and eliminates slipping or squeaking sounds.
Always consult your treadmill’s manual for model-specific tension specifications before adjusting.
Maintenance Habits to Extend Your Treadmill Belt’s Life
Since regular upkeep directly impacts performance, adopting consistent maintenance habits is crucial to extend your treadmill belt’s lifespan.
Begin by establishing a cleaning frequency based on treadmill usage. Typically, clean the belt and deck every 30-60 days. Use appropriate treadmill accessories, such as a soft brush and microfiber cloth, to remove dust and debris without damaging the belt surface.
Regularly inspect the belt for wear or misalignment and adjust tension as needed to prevent excessive friction. Lubricate the belt with a manufacturer-approved lubricant to reduce heat and wear.
Additionally, keep the surrounding area free of dust and dirt to minimize contaminants. By integrating these habits into your routine, you’ll guarantee peak performance and considerably prolong the operational life of your treadmill belt.
Frequently Asked Questions
Can I Use Household Cleaners on My Treadmill Belt?
You shouldn’t use harsh household cleaners on your treadmill belt. Opt for mild cleaning solutions to avoid damage.
Proper belt maintenance involves gentle wiping with a soft cloth dampened in diluted soap and water for best results.
How Often Should I Replace the Treadmill Belt Entirely?
You should replace your treadmill belt every 3 to 5 years, depending on use. Follow treadmill maintenance tips closely, and watch for belt wear indicators like fraying or slipping to guarantee peak performance and safety.
What Causes My Treadmill Belt to Smell Bad?
Your treadmill belt smells bad because sweat, dirt, and oils accumulate, causing belt odor. Regular treadmill maintenance, including cleaning and lubrication, prevents this buildup, ensuring peak performance and extending your belt’s lifespan.
Is It Safe to Run on a Wet Treadmill Belt?
You shouldn’t run on a wet treadmill belt due to safety concerns like slipping and electrical hazards. Always guarantee the belt is completely dry before use to maintain proper traction and prevent potential injuries or damage to the machine.
Can Treadmill Belt Cleaning Affect the Warranty?
Yes, improper cleaning can void warranty implications. You must follow manufacturer cleaning guidelines precisely, using recommended products and methods to maintain warranty coverage.
Avoid harsh chemicals or excessive moisture to guarantee compliance and protect your treadmill’s warranty.
Conclusion
Regularly cleaning your treadmill belt can extend its lifespan by up to 30%, saving you money on repairs and replacements. By preparing your machine properly and following step-by-step cleaning instructions, you ensure it stays in top condition. Lubricating at the right times also helps keep your treadmill running smoothly and quietly.
Remember, preventing dirt and sweat buildup is key to avoiding slippage and noise. Consistent maintenance not only improves performance but also reduces wear and tear on the belt and motor. Stick to these habits to guarantee your treadmill performs at its best for years to come.
In conclusion, taking the time to clean your treadmill belt regularly is essential for maintaining its efficiency and longevity. Proper care will help you get the most out of your treadmill and enjoy a safer, quieter workout experience.