How Do You Adjust the Belt on a Treadmill
To adjust the belt on a treadmill, first unplug the machine for safety. Locate the rear roller adjustment bolts on the treadmill deck. Use an Allen wrench to make small, quarter-turn adjustments to these bolts.
Tighten the bolt on the side the belt drifts toward to help center it. Loosen the bolt if the belt feels too tight or is slipping.
After making adjustments, power on the treadmill at a low speed and observe the belt’s movement and tension. Continue making small adjustments as needed to ensure proper alignment, ideal tension, and smooth operation.
Key Takeaways
- Unplug the treadmill and locate the rear roller adjustment bolts on each side of the deck before starting any belt adjustments.
- Use an Allen wrench to make small, quarter-turn adjustments by tightening the bolt on the side the belt drifts toward and loosening the opposite side.
- Adjust belt tension by tightening bolts to reduce slipping or loosening if the belt is too tight and causing friction.
- After adjustment, power on the treadmill at low speed to test belt tracking, alignment, and tension, making further small tweaks as necessary.
- Wear protective gloves and non-slip footwear during adjustment, and avoid over-tightening to prevent excessive belt wear or motor strain.
How to Adjust Your Treadmill Belt: A Quick Overview
Adjusting your treadmill belt properly guarantees smooth operation and prolongs the machine’s lifespan.
Begin by unplugging the treadmill to confirm safety. Next, inspect the belt for any signs of belt wear, such as fraying or uneven edges.
To adjust, locate the adjustment bolts at the rear roller. Use a hex key to turn these bolts: tighten to center and tension the belt, or loosen to reduce friction.
Make small, incremental turns; quarter turns are sufficient to avoid over-tightening, which can accelerate belt wear or damage the motor.
After adjustments, plug in the treadmill, start it at a low speed, and observe belt alignment and smoothness.
Repeat adjustments if necessary during routine treadmill maintenance to maintain peak performance and extend belt life.
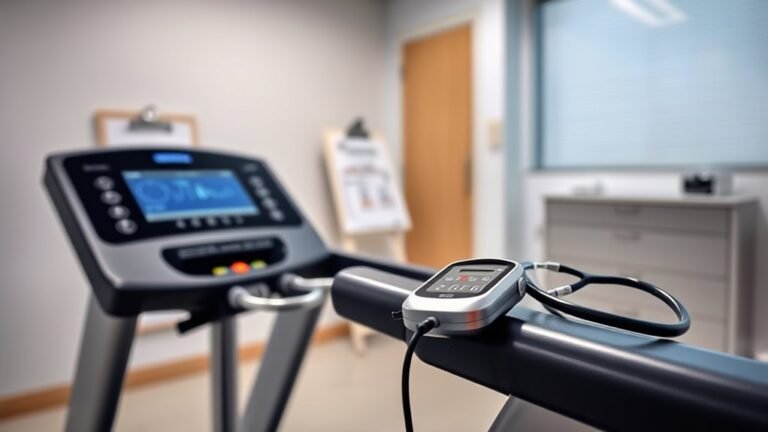
What Tools You Need to Adjust Your Treadmill Belt
To properly adjust your treadmill belt, you’ll need a few essential tools like a hex key or Allen wrench to access the adjustment bolts.
It’s important to have measurement devices, such as a ruler or tape measure, to guarantee the belt is centered and tensioned correctly.
Don’t forget safety gear like gloves to protect your hands during the process.
Essential Adjustment Tools
A few essential tools will make it easier for you to properly adjust your treadmill belt. Regularly monitoring belt wear and maintaining the correct adjustment frequency prevents damage and guarantees smooth operation.
To perform precise adjustments, gather these tools:
Allen wrench set: For loosening and tightening adjustment bolts.
Screwdriver (flathead or Phillips): To access screws securing the belt or motor cover.
Adjustable wrench: For fine-tuning tension bolts.
Cleaning cloth: To remove debris around adjustment points.
Using these tools, you can carefully modify belt tension and alignment.
Remember, consistent checks on belt wear and adjustment frequency maximize treadmill lifespan and performance. Avoid over-tightening, which accelerates wear or causes belt slippage.
Having these tools on hand streamlines maintenance and lets you respond promptly to any belt issues.
Recommended Measurement Devices
Accurate measurements are essential when fine-tuning your treadmill belt to confirm ideal tension and alignment. Using precise belt measurement tools guarantees you avoid slippage or uneven wear. Electronic measuring devices, such as digital calipers and laser distance meters, provide exact readings for effective adjustments.
Below is a table summarizing recommended tools and their functions:
| Tool | Purpose | Notes |
|---|---|---|
| Digital Caliper | Measures belt thickness | High precision |
| Laser Distance Meter | Measures belt length and position | Non-contact measurement |
| Tension Gauge | Checks belt tension | Ensures proper tightness |
| Ruler or Tape Measure | Basic length measurement | Manual, less precise |
| Protractor | Measures alignment angle | Helps with belt tracking |
Selecting the right belt measurement tools and electronic measuring devices confirms efficient treadmill belt adjustments.
Safety Gear Considerations
Although adjusting your treadmill belt requires precise tools, ensuring your personal safety with the right gear is equally critical.
Before starting, equip yourself with essential safety gear to prevent injury and maintain control during the procedure.
Always wear proper footwear with non-slip soles to provide stability on treadmill surfaces and avoid accidental slips. Additionally, use protective gloves to improve grip and shield your hands from sharp components.
Consider safety glasses to guard against debris or accidental tool slips. Finally, have a sturdy flashlight for clear visibility of adjustment points.
Essential safety gear includes:
- Proper footwear with non-slip soles
- Protective gloves for hand safety
- Safety glasses to protect eyes
- Flashlight for enhanced visibility
Using this gear helps you adjust the belt safely and accurately.
How to Tighten a Loose Treadmill Belt
To tighten a loose treadmill belt, start by unplugging the machine to guarantee safety.
Locate the adjustment bolts at the rear of the treadmill deck. Using an Allen wrench, turn each bolt clockwise in small increments, typically a quarter turn at a time.
After each adjustment, plug in the treadmill briefly and test the belt tension by running it at a slow speed. The belt should move smoothly without slipping or drifting to one side.
Test the belt tension by running the treadmill slowly after each adjustment to ensure smooth, centered movement.
Avoid overtightening, which can accelerate belt wear and strain the motor.
Regular treadmill maintenance includes checking belt tension to prevent excessive slippage or damage.
If the belt still feels loose after several adjustments, inspect it for signs of belt wear or consider professional servicing to maintain peak performance and prolong the treadmill’s lifespan.
How to Loosen a Treadmill Belt That’s Too Tight
If your treadmill belt feels overly tight or causes excessive friction, it’s time to adjust the tension.
You’ll need an appropriate hex wrench or Allen key to access the adjustment bolts.
Follow a precise step-by-step process to gradually loosen the belt until it moves smoothly without slipping.
Identifying Belt Tension Issues
When your treadmill belt feels overly tight or causes excessive wear, you need to check its tension immediately. Excessive tension can lead to premature belt wear and strain on the motor.
To identify tension issues, inspect these key tension indicators:
- Difficulty lifting the belt off the deck by 2-3 inches at the center
- Unusual noise or squeaking during operation
- Visible belt fraying or uneven belt edges
- Motor overheating or erratic speed fluctuations
Regularly monitoring these signs helps you determine if the belt is too tight. Addressing tension problems promptly prevents damage to the treadmill and extends belt life.
If you notice any of these indicators, it’s time to adjust the belt tension carefully.
Tools Needed For Loosening
Noticing signs like difficulty lifting the belt or motor overheating signals the need to adjust belt tension.
Before loosening a treadmill belt that’s too tight, gather vital tools. You’ll need an Allen wrench or hex key appropriate for your treadmill model to access and turn the adjustment bolts.
A screwdriver may be required to remove the motor cover safely. Additionally, have a cloth handy to wipe down surfaces, minimizing belt wear during handling. Keep a flashlight nearby for better visibility in tight spaces.
Understanding your treadmill’s adjustment frequency is important; frequent loosening may indicate underlying issues. Using the correct tools guarantees precise, damage-free adjustments and extends belt life.
Avoid makeshift tools to prevent stripping bolts or causing uneven tension, which accelerates belt wear.
Step-by-Step Adjustment Process
Start by unplugging your treadmill to verify safety before making any adjustments.
To loosen a belt that’s too tight and improve treadmill performance while reducing belt wear, follow these steps carefully:
Locate the adjustment bolts at the rear of the treadmill deck. Use the appropriate Allen wrench to turn each bolt counterclockwise in small increments.
After each adjustment, manually rotate the belt to check for proper tension and alignment.
Plug in the treadmill, power it on, and test by walking slowly to confirm the belt isn’t slipping or too loose.
Repeat this process as necessary, making subtle changes to avoid over-loosening.
Proper tension verifies smooth operation, reduces strain on the motor, and extends belt lifespan.
How to Align a Treadmill Belt That Drifts to One Side
Although a treadmill belt drifting to one side is common, you’ll need to realign it promptly to prevent uneven wear and guarantee smooth operation. First, unplug the treadmill for safety.
A drifting treadmill belt is common but must be realigned quickly to avoid wear and ensure smooth running.
Locate the rear roller adjustment bolts on each side of the deck. Identify which side the belt drifts toward; this side’s bolt will require tightening, while the opposite side’s bolt needs loosening.
Use an Allen wrench to make small, quarter-turn adjustments, then check belt position. Repeat until the belt runs centered.
Keep in mind that belt misalignment causes include uneven tension or debris under the belt. Regular treadmill maintenance tips recommend cleaning the deck and lubricating the belt to prevent drifting.
Always consult your treadmill’s manual for model-specific guidance before adjusting.
How to Test Your Treadmill Belt After Adjusting It
Once you’ve realigned the treadmill belt by adjusting the rear roller bolts, verifying the belt’s performance guarantees it operates smoothly and safely.
Begin by powering on the treadmill and setting it to a low speed. Observe the belt’s tracking and tension for any lateral drift or slippage.
Use these key steps to collect precise adjustment feedback:
- Walk on the belt, noting any slipping, hesitation, or uneven tension.
- Increase speed gradually, monitoring consistent belt movement.
- Listen for unusual noises indicating friction or misalignment.
- Check that the belt remains centered throughout the speed range.
If the belt runs smoothly without drifting or noise, your adjustment is successful.
Repeat testing after any fine-tuning to confirm ideal belt performance and safety before regular use.
Common Mistakes When Adjusting Your Treadmill Belt
When adjusting your treadmill belt, you’ll encounter common mistakes that can compromise performance and safety if not addressed properly. One frequent error is over-tightening, which accelerates belt wear and stresses the motor.
Over-tightening your treadmill belt can cause excessive wear and strain the motor, compromising safety and performance.
Conversely, a belt that’s too loose can slip, causing inconsistent movement and potential injury.
Another mistake is ignoring the adjustment frequency; adjusting too often or too rarely can disrupt belt alignment and reduce lifespan. You must always verify the belt is centered before making adjustments to prevent uneven wear.
Additionally, skipping proper cleaning before adjustments leads to debris affecting tension accuracy. Use the correct tools and follow the manufacturer’s torque specifications to avoid damage.
Avoid rushing the process; precise, measured adjustments guarantee ideal treadmill function and longevity.
When It’s Time to Call a Pro for Your Treadmill Belt
How do you know if your treadmill belt issue requires professional help? When adjusting the belt doesn’t resolve problems or you encounter complex issues, it’s time to seek professional repair.
Attempting advanced fixes without expertise may worsen damage or void warranties.
Consider contacting a technician for treadmill servicing if you notice:
- Persistent slipping or uneven movement despite adjustments
- Unusual noises originating from the belt or deck
- Visible belt damage such as fraying or deep cuts
- Malfunctioning electronic controls linked to belt operation
A certified technician can accurately diagnose and resolve underlying problems, ensuring your treadmill functions safely and efficiently.
Prioritize professional repair over DIY attempts for issues beyond basic belt tensioning to maintain peak performance and prolong equipment lifespan.
Regular Maintenance Tips to Extend Your Treadmill Belt
If professional repair isn’t necessary, you can greatly extend your treadmill belt’s lifespan through consistent maintenance.
Begin with regular belt cleaning to remove dust, sweat, and debris that accumulate during workouts. Use a damp cloth and mild detergent, avoiding harsh chemicals that may degrade the belt material.
Regularly clean your treadmill belt with a damp cloth and mild detergent to remove workout residue safely.
Follow the manufacturer’s lubrication schedule precisely, typically every 3 to 6 months, to minimize friction between the belt and deck.
Apply a silicone-based lubricant evenly under the belt, ensuring the treadmill is unplugged during this process.
Also, routinely inspect belt tension and alignment, adjusting as needed to prevent uneven wear.
Frequently Asked Questions
How Often Should I Replace My Treadmill Belt?
You should replace your treadmill belt every 3 to 5 years, depending on usage and treadmill maintenance. Monitor belt lifespan by checking for wear, fraying, or slipping to guarantee peak performance and safety during workouts.
Can Treadmill Belts Be Lubricated?
Think of your treadmill belt as a smooth river; yes, you can lubricate it. Proper belt maintenance involves applying silicone-based lubricants beneath the belt.
Follow precise lubrication techniques to reduce friction and extend the belt’s lifespan efficiently.
What Causes Treadmill Belts to Wear Out Quickly?
You’ll see treadmill belts wear out quickly due to poor treadmill maintenance, misalignment, or lack of lubrication. Regularly cleaning, adjusting tension, and lubricating extend belt lifespan and guarantee smooth, durable treadmill performance over time.
Are All Treadmill Belts Universal or Brand-Specific?
Don’t put all your eggs in one basket; treadmill belt compatibility varies widely. You’ll find most belts are brand-specific, designed with unique features, so always check your model’s specs before swapping to guarantee a perfect fit.
How Do Temperature and Humidity Affect Treadmill Belts?
You’ll notice temperature and humidity directly impact belt maintenance, causing expansion or contraction. To minimize environmental impact, monitor conditions closely and adjust tension regularly, ensuring ideal performance and preventing premature wear or damage to your treadmill belt.
Conclusion
Now that you know how to adjust your treadmill belt, you’re ready to keep your machine running smoothly—no need to send a telegram! Remember, proper tension and alignment prevent wear and guarantee safety. Always use the right tools, make small adjustments, and test thoroughly.
Avoid common mistakes like overtightening your treadmill belt. If problems persist, don’t hesitate to call a professional. Regular maintenance will extend your treadmill’s life and keep your workouts on track.
By mastering how to adjust the belt on a treadmill, you ensure optimal performance and safety every time you exercise.